 BANARTA

Pipes that stay in the panel are not, by themselves, evidence that a floor is ready for screed. The handover also needs to resolve panel joints, perimeter details, pipe crossings and the installation test record. Once covered, these details become harder to inspect or correct.
This guide is for teams coordinating an EPS panel selected for a wet hydronic floor assembly. Confirm the exact panel reference and the project’s system instructions first: EPS is a material description, not approval for every wet or dry floor construction. The checks below organize the handover; they do not replace the system designer’s details or the screed manufacturer’s requirements.
Separate three handovers
Assign a named person to accept each stage. Record any outstanding item against a location on the floor plan, rather than treating “panels installed” as permission for the next trade to cover the work.
| Stage | Evidence to hand over | Decision |
|---|---|---|
| 1. Base and panels → pipe installer | The base meets the selected system’s preparation requirements; panels are supported and undamaged; the four interface types below are identified. Required joint and perimeter materials are available, with responsibility for fitting them assigned. | The pipe installer accepts the area for pipe installation, or records a hold with the panel installer/site coordinator. |
| 2. Pipe installation → screed contractor | Pipe restraint, circuit identification and crossings match the agreed layout. Interface defects are closed. The responsible heating installer supplies the required test record and confirms any conditions to maintain during screed placement. | The designated site coordinator releases the area for covering only after the relevant installers and screed contractor have resolved their items. |
| 3. Screed placement → commissioning and floor finish | Placement and protection are recorded. Curing requirements, the authorized first-heating procedure and the floor-covering acceptance criteria are separately identified. | Completion of one stage does not automatically release the next. Each responsible trade records acceptance under the project specification. |
Uponor’s Solid Screed Installation Instructions cover base preparation, edge details, pipe inspection and testing before covering. Its installation instructions are specific to the systems described; use the document to understand the sequence, not to transfer installation dimensions to a different panel.
Mark four interfaces before the pipes hide them
On a room plan, mark each relevant location as F, C, P or X. These are convenient labels for this handover, not industry-standard codes. Beside each unresolved location, write the approved detail reference, who supplies the missing material, who installs it and who checks completion.
| Interface | What to check and record |
|---|---|
| F — Factory edges | Identify the panel’s original joining arrangement. Check that edges are correctly engaged or overlapped as specified and are not damaged. Do not assume an interlocking edge alone provides the required screed containment or moisture-control function. |
| C — Cut edges and reused offcuts | Mark where cutting removed a factory edge or overlap. Obtain the selected system’s approved cut-joint detail and identify the materials needed before accepting the offcut for that location. Record open butt joints as unresolved until the specified connection is complete. |
| P — Perimeter and skirt interfaces | Check the continuous perimeter detail around walls, columns and door frames. Where the selected system uses a skirt or apron, verify its connection to the panel surface. Record who completes interruptions and who determines the later trimming stage. |
| X — Penetrations and crossings | Locate services passing through the assembly, pipe routes through walls and doorways, and crossings of planned movement joints. Match each to its specified protection and interface detail; do not let a convenient pipe route decide the joint arrangement. |
Why distinguish factory and cut edges? The Uponor Tecto Technical Guide describes different components for original panel edges, cut-panel joints and door transitions. REHAU’s In-Screed Planning Notes for Australia and New Zealand also distinguish factory foil overlaps from joints without an overlap. These examples show why a cut joint needs its own detail. They do not establish that those accessories fit a Banarta panel.
A panel quantity allowance can include reusable offcuts while still omitting the connection materials those offcuts require. Resolve that gap before pipe installation makes the joints difficult to reach. Neither a HIPS facing nor a neat-looking panel joint should be treated as proof of a complete waterproofing or damp-proofing layer.
Make the test record and photographs useful to the next trade
Before the screed visit, name the heating installer responsible for the specified test and record. The record should identify the circuits tested, the applicable procedure, the result, the date and the responsible person. Any required conditions during screed placement, and the person monitoring them, should be agreed with the screed contractor. A photograph of installed pipes does not replace a test record.
For the photographic handover, take a room overview showing the circuit layout, then close views of the marked F/C/P/X locations before they are concealed. Include a fixed landmark or plan reference so another trade can locate the detail. Keep the before-and-after views of repaired defects, with the corresponding item marked closed.
Hold the affected area when a specified joint detail is missing, a required containment connection remains open, a pipe is damaged or inadequately restrained, a crossing has no approved detail, or the required test is incomplete or unsuccessful. Record the responsible person and the evidence needed to close the item. Do not substitute extra screed for an unresolved installation defect.
Example: ready for pipe installation is not ready for screed
Consider a room where a pipe sample fits the studs and the installer can follow the planned route. At the doorway, however, two reused offcuts meet without their original joining edges. The cut-joint detail and its materials have not been confirmed. The installation test record is also outstanding.
The pipe-fit check answers a useful question, but it does not release that area for covering. The coordinator first obtains the correct cut-joint detail; the assigned supplier and installer provide and fit the required materials; the interface is photographed and checked. The heating installer then completes the specified test and record. Only after the open items are accepted does the screed handover proceed. This is an illustrative coordination example, not a reported Banarta project.
Keep curing, first heating and floor-covering acceptance separate
After placement, follow the screed supplier’s protection and curing instructions. First heating follows the authorized commissioning procedure for the actual screed and heating system. The floor-covering installer then checks the applicable readiness criteria, including moisture requirements where relevant. Do not assume heating can be used to shorten curing, or that completing a heating cycle automatically means the floor is ready for its finish.
REHAU’s planning notes separate screed curing, controlled heating and floor-covering readiness. For earlier planning, Uponor’s solid screed tacker overview and installation preparation guide explain why system selection and pipe-layout planning come before installation. No universal pressure, test duration, screed thickness or heating temperature is specified here.
Confirm the panel before completing the handover plan
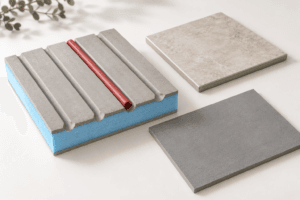
Banarta’s BS-20 EPS floor heating panel page shows a studded EPS construction with HIPS film and interlocking edges. Confirm the exact supplied reference, its suitability for the proposed wet assembly and its joint details before applying this handover workflow. Product supply alone does not define the complete heating, screed or moisture-control system.
If you are still selecting the panel and pipe arrangement, use the EPS panel supplier checklist first. For a material enquiry, send Banarta the selected panel reference and a marked layout, highlighting any cut-edge or perimeter detail that needs clarification. Keep system-design and installation acceptance with the appointed project professionals.